Blog

  • Mewtwo

    Mewtwo Plastic Model from Bandai


    Preparation


    The build started with nitrile gloves to avoid fingerprints, and all runners were unpacked and prepped for painting. A base coat of Mr. Hobby Mr. Colour No. 18 (semi-gloss black) was applied to create a solid foundation and subtle depth for the colours to come.


    Colour Tones and Weathering


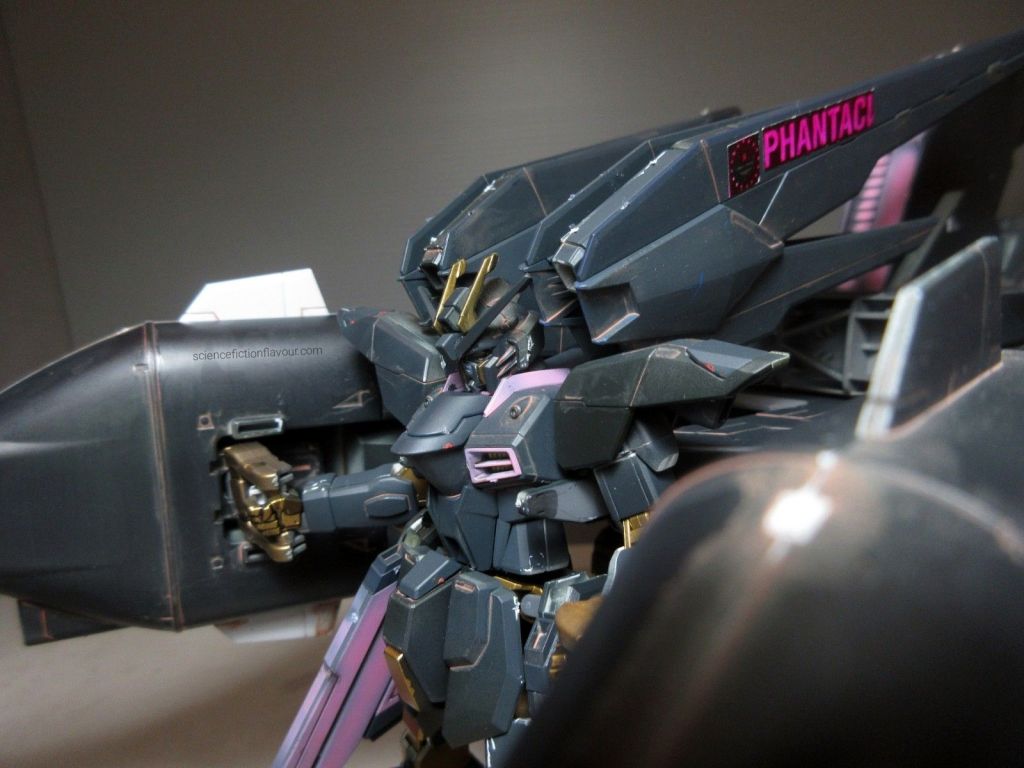
    The kit’s runners came in two shades of purple—light and dark.


    ▪︎Light purple parts: Subtle weathering was applied using Gundam Colour MS Purple, enhancing depth while preserving the base tone.


    ▪︎Dark purple parts: A custom colour was mixed from:
    •MS Purple
    •Mr. Hobby 605 (semi-gloss)
    •Mr. Hobby Character Red (semi-gloss)


    These darker parts were carefully weathered to bring out shadows and contrast, giving the model a dynamic, lifelike appearance.


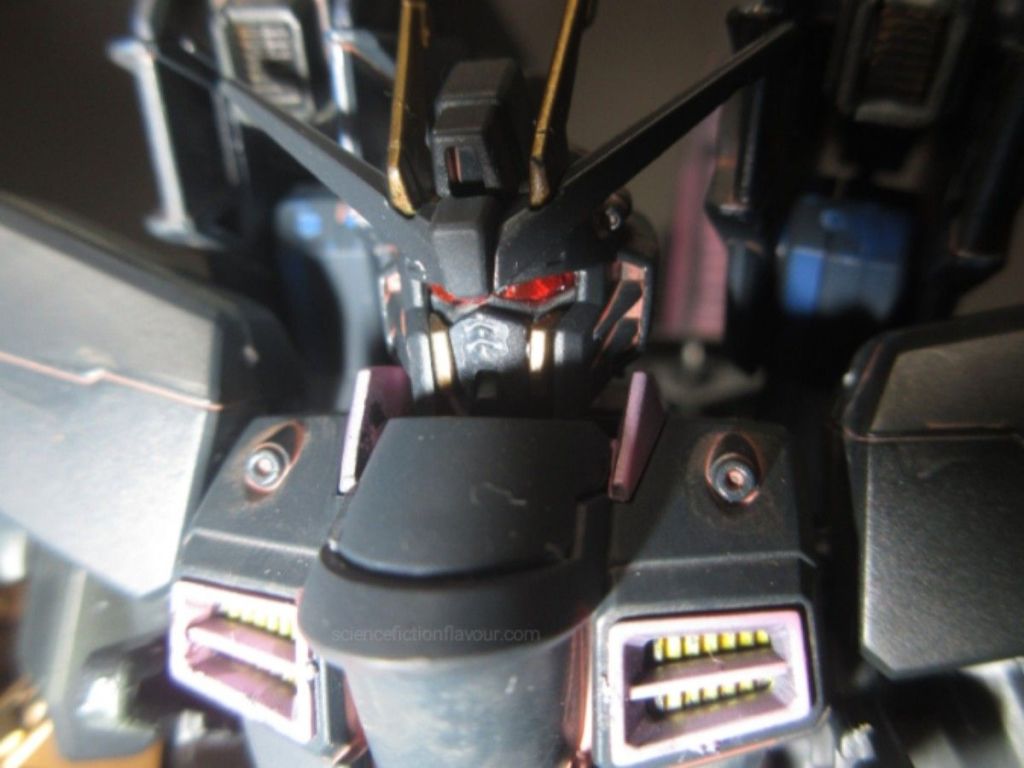
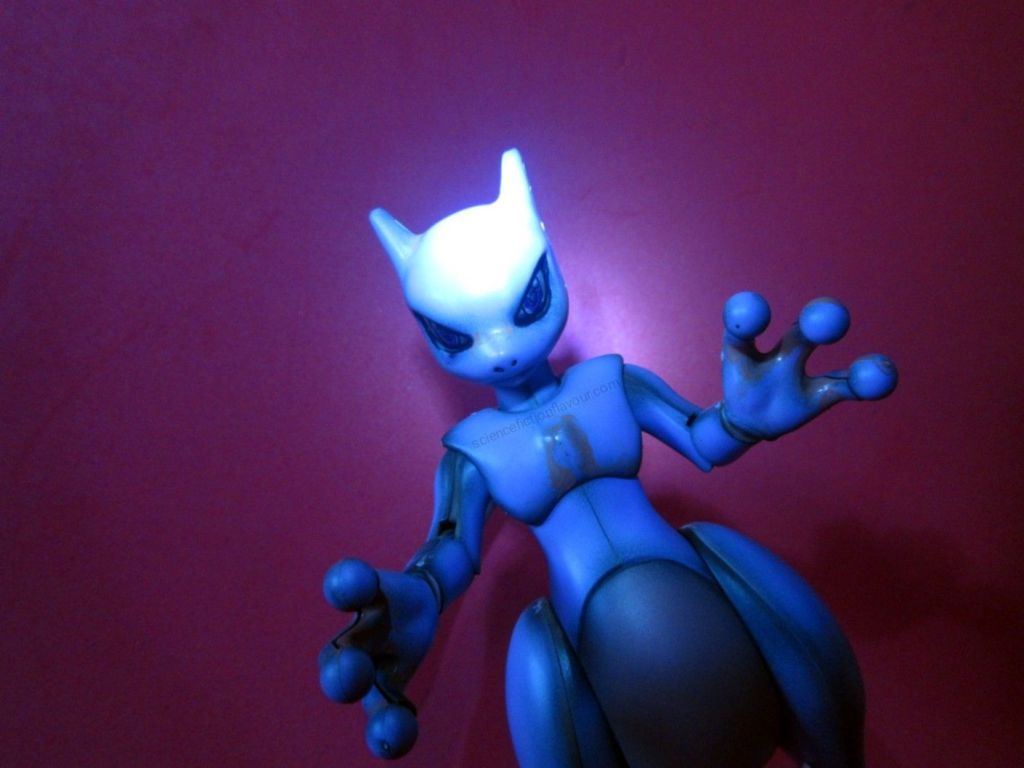
    Eyes and Facial Details
    The eyeballs were highlighted with a silver marker, and the pupils were outlined with dark pink and black markers. This created a subtle panda-eye effect, giving Mewtwo a hostile, sleep-deprived expression that emphasizes its awakened and intense personality.


    Curing and Final Prep
    All parts were allowed to cure overnight to ensure the semi-gloss paint hardened fully, minimizing the risk of fingerprints or smudges.
    The model is now ready for photography and video, with a red backdrop chosen to highlight Mewtwo’s psychic aura and dramatic presence.


    Summary
    This build goes beyond a standard plastic kit: careful base coating, custom colour mixing, weathering, and detailed eye work transform the figure into a collector-grade display piece that captures the character’s intensity and cinematic quality.

  • Bulbasaur

    This build of the Bandai Bulbasaur plastic model focused on depth, tonal variation, and precise surface control. The goal was to elevate a simple kit into a cohesive, visually dynamic piece through careful layering, panel detailing, and considered adjustments.


    Base and Body Layers
    Each part was first coated with a dark base to establish natural shadows and underlying contrast. The body sections were then airbrushed using three distinct shades of green — Mr. Hobby Mr. Color No. 64, 303, and 605. Layered application preserved subtle hints of the darker undercoat, preventing the finish from appearing flat and giving the model a more dimensional presence.


    Whites, Reds, and Eye Detailing
    White and red components were finished in semi-gloss for clarity and restrained shine. During the eye detailing stage, a slight freehand overspray caused some white to mist into the red area. Rather than stripping and repainting, the section was corrected using a dark pink marker. The resulting dark-pink-and-white combination added a softer character to the eyes, complementing the overall finish.


    Panel Lines
    To enhance sculpted details, Tamiya Accent Color Panel Line (Black) was applied carefully into recessed lines. Excess wash was removed using enamel thinner and a cotton bud, leaving behind controlled definition that sharpens the contours without overpowering the softer paint tones.


    Final Assembly and Reflection
    Once fully cured and assembled, the model feels cohesive and balanced. The interplay between layered greens, subtle shading, and refined panel lining elevates the kit beyond its base form. Minor adjustments along the way — such as the eye correction — became part of the build’s character rather than setbacks.
    This build demonstrates how patience, layering, and small course corrections can transform a straightforward kit into a polished, display-ready model.

  • Ohmu

    Bandai’s 1/20 Ohmu from Studio Ghibli was completed today, coinciding with Hayao Miyazaki’s 85th birthday, a fitting tribute to the creature’s origin.


    Painting & Weathering:
    All parts were base-coated with dark hobby paint, then airbrushed with plant-green paint to add natural shading. Tamiya Panel Line Accent (brownish-red) highlighted crevices, giving an organic, weathered appearance.
    The clear orb-like eye parts were first coated with a silver marker and then layered with transparent red hobby paint, creating depth and a soft glow.


    Assembly:
    Sides, base, and optic units assembled smoothly. The legs and other limbs, totaling over 50, required careful attachment. The final result is a fully articulated and visually dynamic creature.


    Reflections:
    Pre-painting parts simplifies assembly and ensures consistent weathering.
    Silver under transparent red produces realistic glowing eyes.
    Patience is essential when attaching repetitive parts, but the visual payoff is significant.
    The finished Ohmu serves as a miniature homage to Studio Ghibli’s imaginative creatures.

  • Buzz Lightyear

    Bandai plastic model kit, base-coated in dark tones and airbrushed with desaturated colours for a weathered finish. Water-slide decals add a more grounded, tech-like look. Built to commemorate Toy Story’s 30th anniversary.

  • METEOR Unit and Freedom Gundam

    This HG 1/144 Bandai build pairs the METEOR Unit with the Freedom Gundam in a customised Ver. J theme. The parts were primed in dark tones and weathered with pink and gold accents to bring out a warm, stylised finish. Clear red paints were used on the optics for extra depth, and Phantaci decals complete the look. The project was finished to commemorate the 20th anniversary of Jay Chou’s November’s Chopin.

  • Tyrannosaurus Rex

    This is a 1/35 scale model kit from X-Plus. I began by soaking the unpainted parts in warm soapy water overnight, then rinsed and dried them the following day.

    The dried parts were airbrushed while still on their runners. I used Mr. Hobby Mr. Color paint no. 18 as the base coat, and Mr. Color paint no. 22 for spot accentuations that gradually evolved into larger patch highlights, giving the skin a natural, mottled appearance. To bring out the fine sculpted details, I applied dark Tamiya Panel Accent Color in the recesses. The tongue was airbrushed in Character Red (Mr. Color paint no. 108) and a touch of bright Tamiya Panel Accent Color was used to simulate saliva.

    For the facial details, I highlighted the eyes with gold permanent marker and added pupils with a fine dark marker. All teeth were painted using a silver permanent marker, giving the mouth a dramatic, striking look.

    Final assembly was straightforward but required patience. Since the kit is non-snap-kit, I built subassemblies step by step – head, torso, tail, thighs and arms before completing the full T. rex form.

    This build is also a small tribute to the 30th anniversary of the real-time strategy game Command & Conquer. Inspired by the game’s hidden Covert Ops T. rex units, the model’s dramatic teeth, golden eyes, and mottled hide reinterpret the classic predator as a game-world war-beast. It is a playful crossover between model-building craftsmanship and a beloved gaming milestone.

  • Carcharodon carcharias

    A snapfit plastic model from Bandai, released through the Exploring Nature Lab product line. The mouldings were of solid-plastic, translucent-plastic, and rubber materials.

    I had the solid plastics airbrushed with Mr. Hobby paints, and the translucent and elastic pieces left unpainted. Panel line accentution solution was applied to the rubbery parts.

    In the final assembly, the pieces gripped together firmly.

  • Batmobile (Batman Begins version)

    Scale 1/35 plastic model from Bandai. A good majority of the components were snap-fit, while only a few required adhesive to hold. Super-glue was used to keep some of the wing flaps in place. Mr. Hobby paints were used to airbrush the parts and Tamiya panel line accentuation solution to bring out the details on the parts’ recesses.

  • All Terrain Armoured Transport (AT-AT)

    Scale 1/144 plastic model from Bandai.

    A snap-fit project with overall straightforward building instructions. The machine has numerous flat surfaces which can be satisfying to airbrush. Comes with intricate detailing parts and removable side plates.