Category: Manufacturing

  • Da Vinci Series Clock

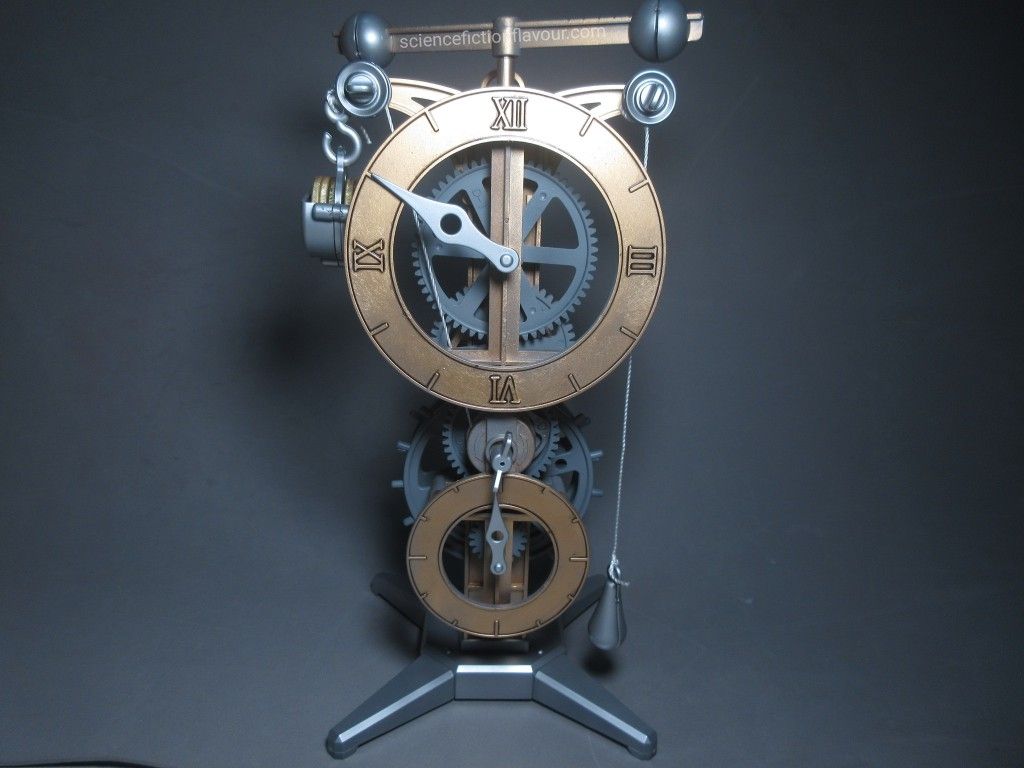
    Academy Da Vinci Series Clock Model Kit

    Completed on 10 October 2026 — Journée Internationale de l’Horlogerie

    Painting and Preparation

    All parts were airbrushed with GSI Creos Mr. Hobby Mr. Color No. 13 Neutral Grey as a base coat.

    Parts moulded on the brown runners were subsequently airbrushed with Mr. Color No. 9 Gold, while parts on the dark grey runners received Mr. Color No. 8 Silver. The individual dark grey plastic parts that had been detached from the runners were left in Neutral Grey.

    Other individual parts moulded in brown plastic were airbrushed with Mr. Color No. 9 Gold. These included the beams and clock faces, giving them a metallic finish.

    For easier handling during painting, individual parts that came separately from the runners were mounted on satay sticks before airbrushing.

    Panel Lining

    After airbrushing, Tamiya Panel Line Accent Color (Black) was applied to bring out the details. Excess panel liner was removed using cotton buds moistened with Tamiya X-20 Thinner.

    This helped accentuate the mechanical details and add definition to the clock’s various components.

    Assembly

    Assembly was generally straightforward, with the instruction manual providing a clear sequence to follow.

    The only challenging point came at Step 3, where a vice clamp was needed to secure parts A7 and A8 to part B-2. The clamp provided the additional pressure needed to fit the components together properly.

    The kit also included metal rods of specific lengths that had to be measured during assembly. A measuring tape was therefore necessary to check their dimensions. In the end, I used an IKEA paper measuring tape that I had on hand. Haha!

    Completion

    The Academy Da Vinci Series Clock Model Kit was completed on 10 October 2026, coinciding with Journée Internationale de l’Horlogerie (International Watchmaking Day).

    This was an interesting change from assembling conventional plastic model kits. Beyond painting and detailing the components, the build involved fitting mechanical parts together and measuring metal rods to the required lengths.

    Although assembly was generally straightforward, Step 3 required some extra effort, while the metal rods called for careful measurement. Overall, it was a satisfying project that combined model-making techniques with practical mechanical work.

    Completing a clock model on a day dedicated to horology made for a particularly fitting conclusion to the build.
  • Electromotive Style Injection Machine

    Bandai 1/60 Electromotive Style Injection Machine

    Manufacturing Day 2026 — 2 October 2026

    To mark Manufacturing Day 2026, a fitting subject was chosen: Bandai’s 1/60 Electromotive Style Injection Machine.

    Rather than a Gundam or conventional mecha, this unusual hobby kit represents the industrial machinery used to manufacture plastic model kits.

    From Black Plastic to Painted Machine

    The kit consists of a single runner, with all parts moulded in black plastic. A silver “Ecopla” sticker is included on the box.

    Initially, having the entire runner in one colour seemed likely to make the painting process more difficult. Without colour-separated plastic to provide guidance, the parts had to be studied individually and the colour allocation determined by observation.

    This encouraged a more deliberate approach to the surfaces and finishing.

    All parts first received an airbrushed base coat of Mr. Color No. 13 Neutral Grey.

    Paint Allocation

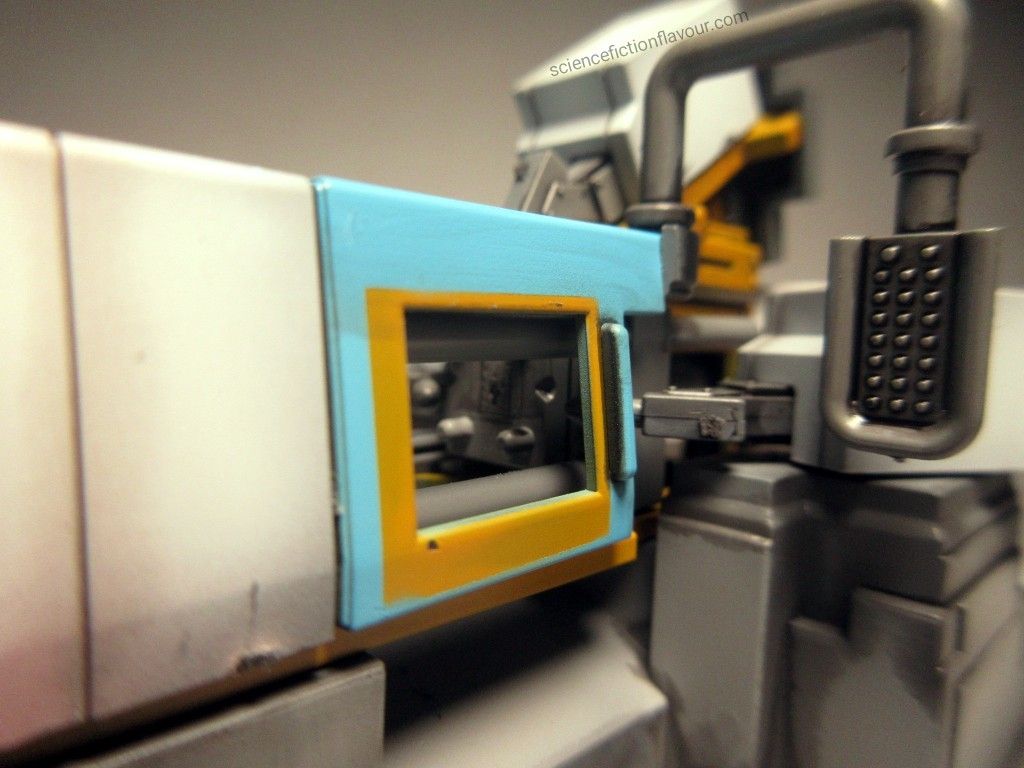
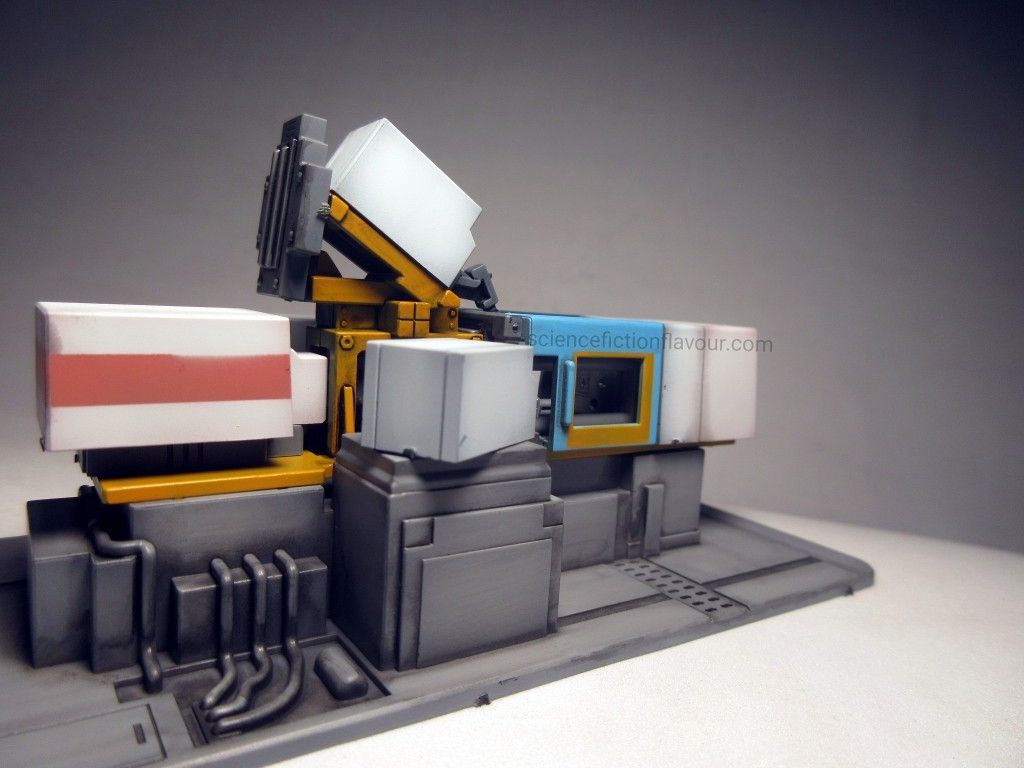
    Parts 5 and 6 were base coated with Mr. Color No. 109 Character Yellow. The supplied stickers were repurposed as masking material to protect the areas intended to remain yellow before Mr. Color No. 323 Light Blue was airbrushed over the exposed sections. As the parts were thin, the Light Blue was applied as a uniform coat rather than heavily weathered.

    The masking stickers were inadvertently switched between the two parts. Consequently, the yellow perimeter around the side-door window is thicker toward the lower section rather than the upper section. The result was left as it was.

    Parts 14 and 15 also received Mr. Color No. 109 Character Yellow.

    Part 19 was base coated with Mr. Hobby Gundam Color UG10 MS Char’s Pink. The pink area was masked before Mr. Color No. 107 Character White was applied to the exposed section.

    Part 20 received a different treatment. Selected wall surfaces were first airbrushed with Mr. Hobby Gundam Color UG10 MS Char’s Pink, while others remained Mr. Color No. 13 Neutral Grey. Masking had initially been planned, but was abandoned in favour of weathering the entire part with Mr. Color No. 107 Character White. The White was airbrushed over the whole part, leaving pinkish and greyish tones visible around the outer rim of the weathered sections.

    The remaining Neutral Grey areas were lightened with a mixture of Mr. Color No. 13 Neutral Grey and No. 107 Character White, adding tonal variation to the overall finish.

    Panel Lining and Finishing

    After airbrushing, Tamiya Panel Line Accent Color Black was applied to the moulded details. Excess was removed with cotton buds dampened with Tamiya X-20.

    For the final assembly, the supplied stickers were deliberately left unused. This omits details such as the alphanumeric prefix, chamfered rectangular markings, and simulated vent lines.

    The resulting minimalist finish keeps the focus on the machine’s forms, painted surfaces and restrained detailing.

    A Machine Behind the Models

    There is something appropriately circular about building a model of an injection-moulding machine.

    Injection-moulding machine → plastic → model kit → modeler.

    The machinery behind the hobby has itself become a model on the workbench.

    For Manufacturing Day 2026, Bandai’s 1/60 Electromotive Style Injection Machine offers a different kind of model-building experience: one that turns attention towards the industrial process behind the hobby itself.